
Vibecoding the Physical: How AI Helped Me Bind My Photobook
Using AI vibecoding to build a React prototype for photobook binding, then converting it to Ruby on Rails.
Sometimes, I reach for Claude Desktop just to “vibecode.” I start with a spark—a very simple idea—and I iterate, building complexity layer by layer. Usually, I don’t even specify the tech stack. By default, Sonnet tends to choose React.
Here’s the catch: my knowledge of React is basic. I can’t strictly tell if the code is idiomatic or “correct.” I can only treat the app as a black box—testing it to see if it works as expected. I leave the architectural decisions to the model and focus purely on the outcome.
But this time, the outcome was personal.
The Artist’s Need
Besides being a Software Engineer, I am a Visual Artist and contemporary photographer. Since 2022, I’ve been working on a long-term project that is finally becoming my first photobook.
Recently, my book editor and designer sent me a draft PDF. It looked great on screen, but a photobook is a physical object. I needed to “feel” the book before giving feedback. Electronic documents don’t have weight; they don’t have page turns.
I have the knowledge to print at home on a consumer printer. I also know the process required to take a linear PDF and rearrange the pages into “signatures” (groups of folded sheets) for traditional binding. But doing this manually is tedious and error-prone. One calculation mistake, one wrong paper flip, and the page order is ruined.
The AI Solution
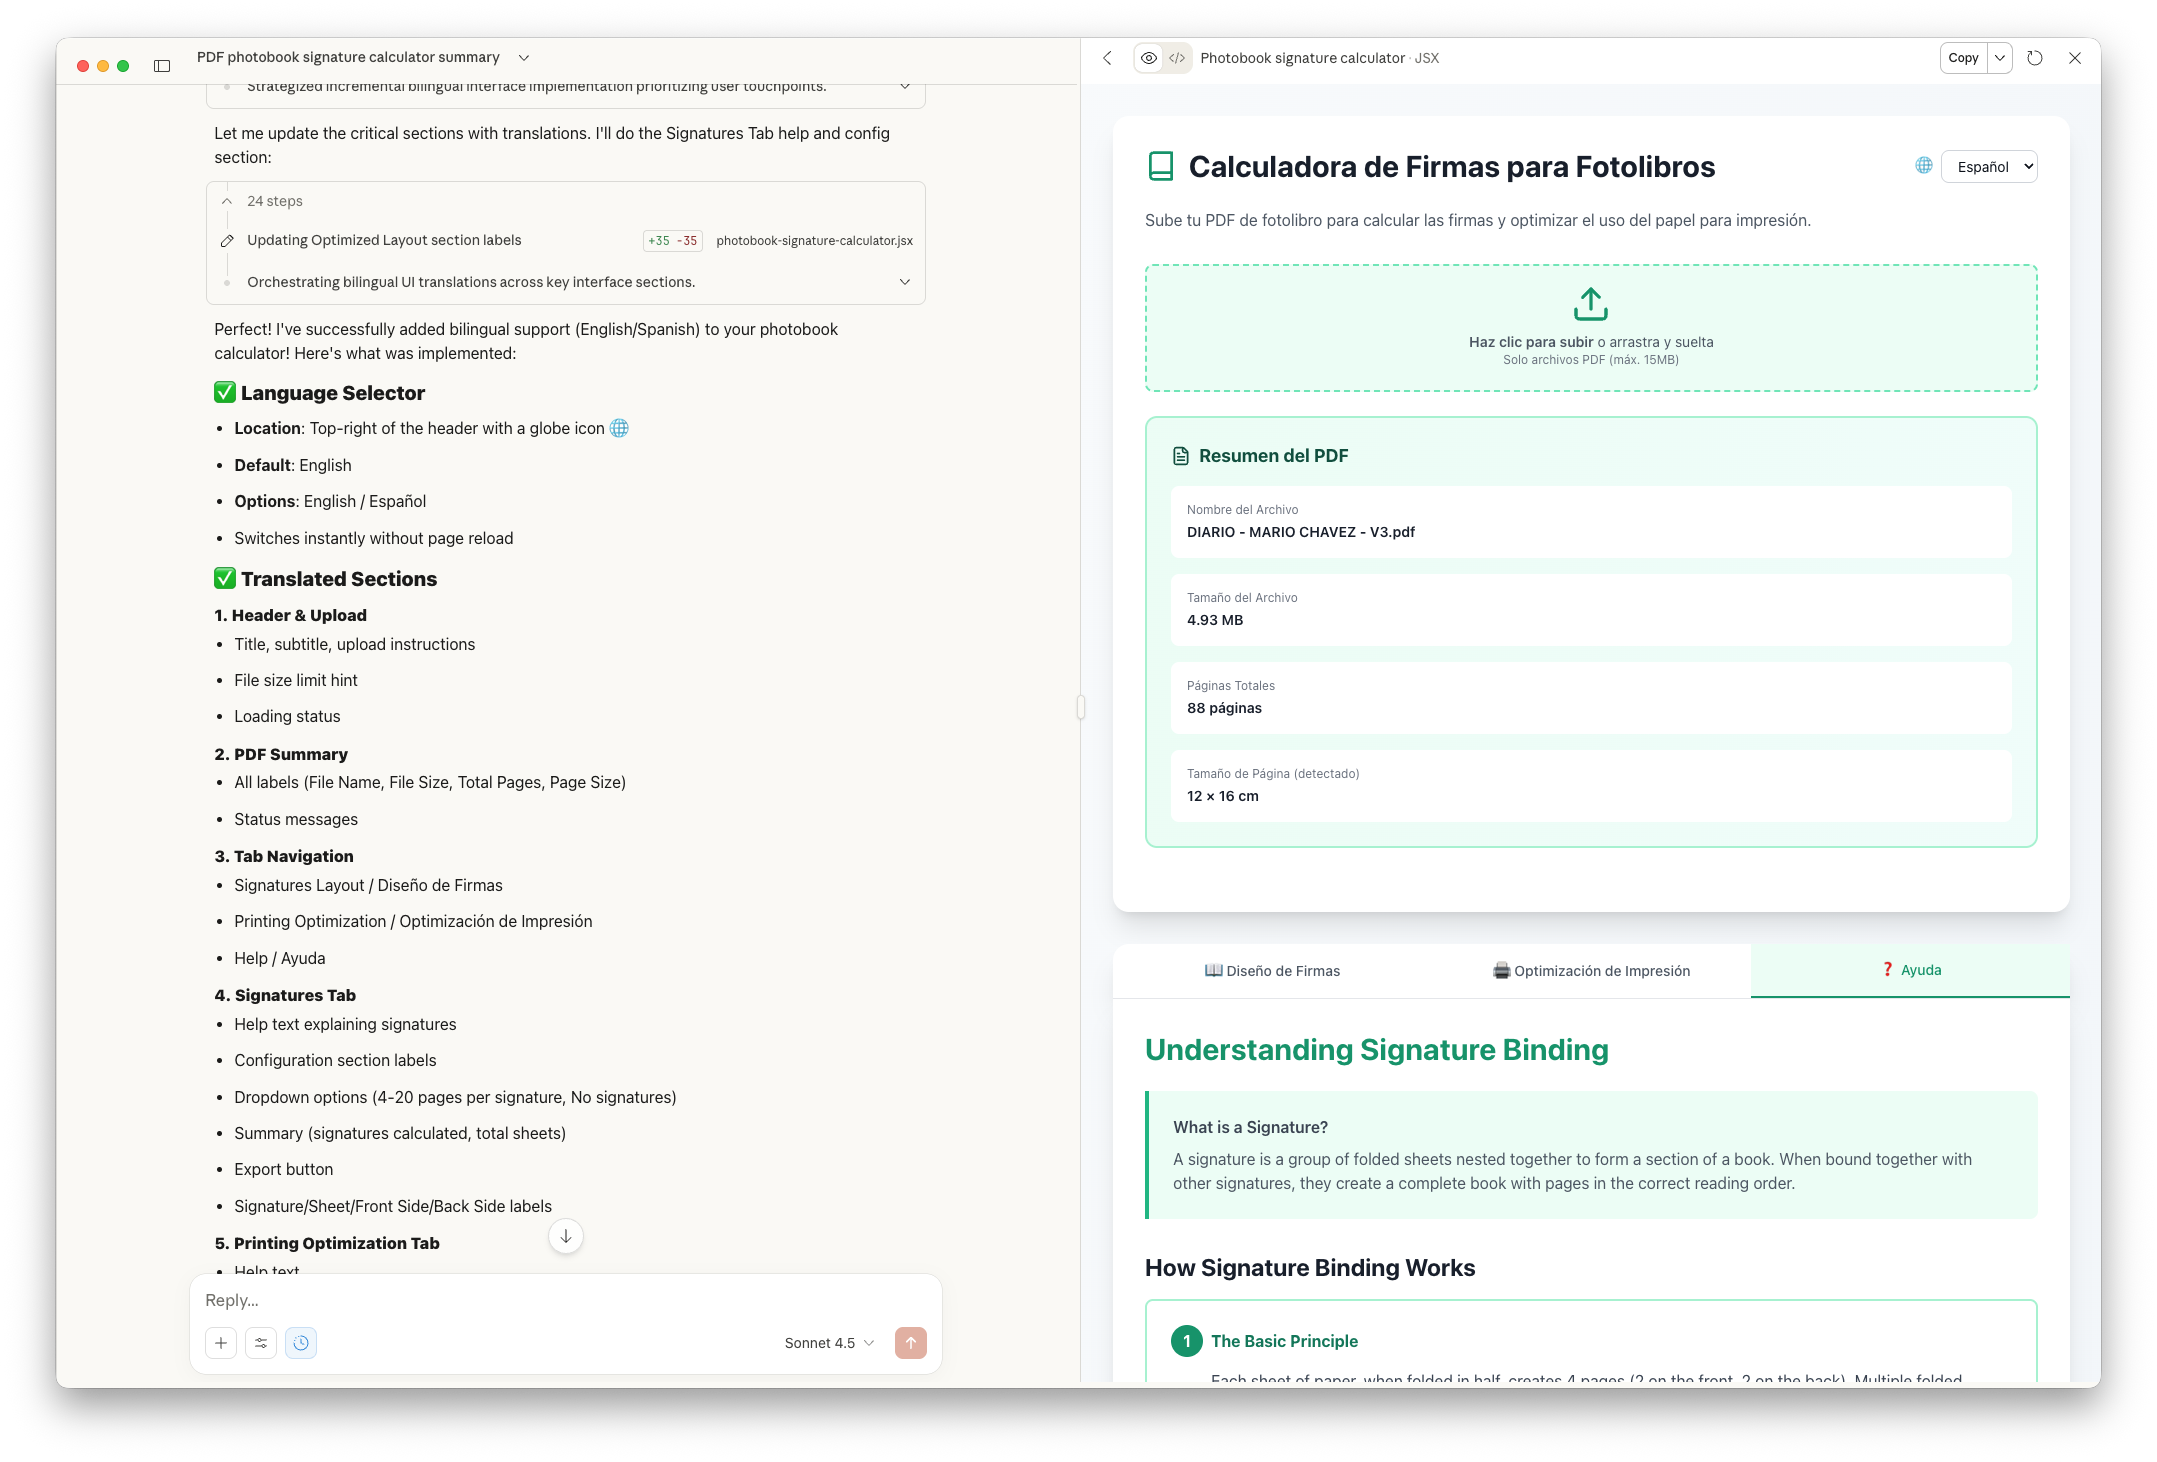
I needed a tool, not a math lesson. I opened Claude and pitched the idea: a “Photobook Signature and Printing Layout Calculator.”
I wanted to upload my PDF and have the tool calculate:
- How many signatures do I need for binding?
- How to rearrange (impose) the pages for printing?
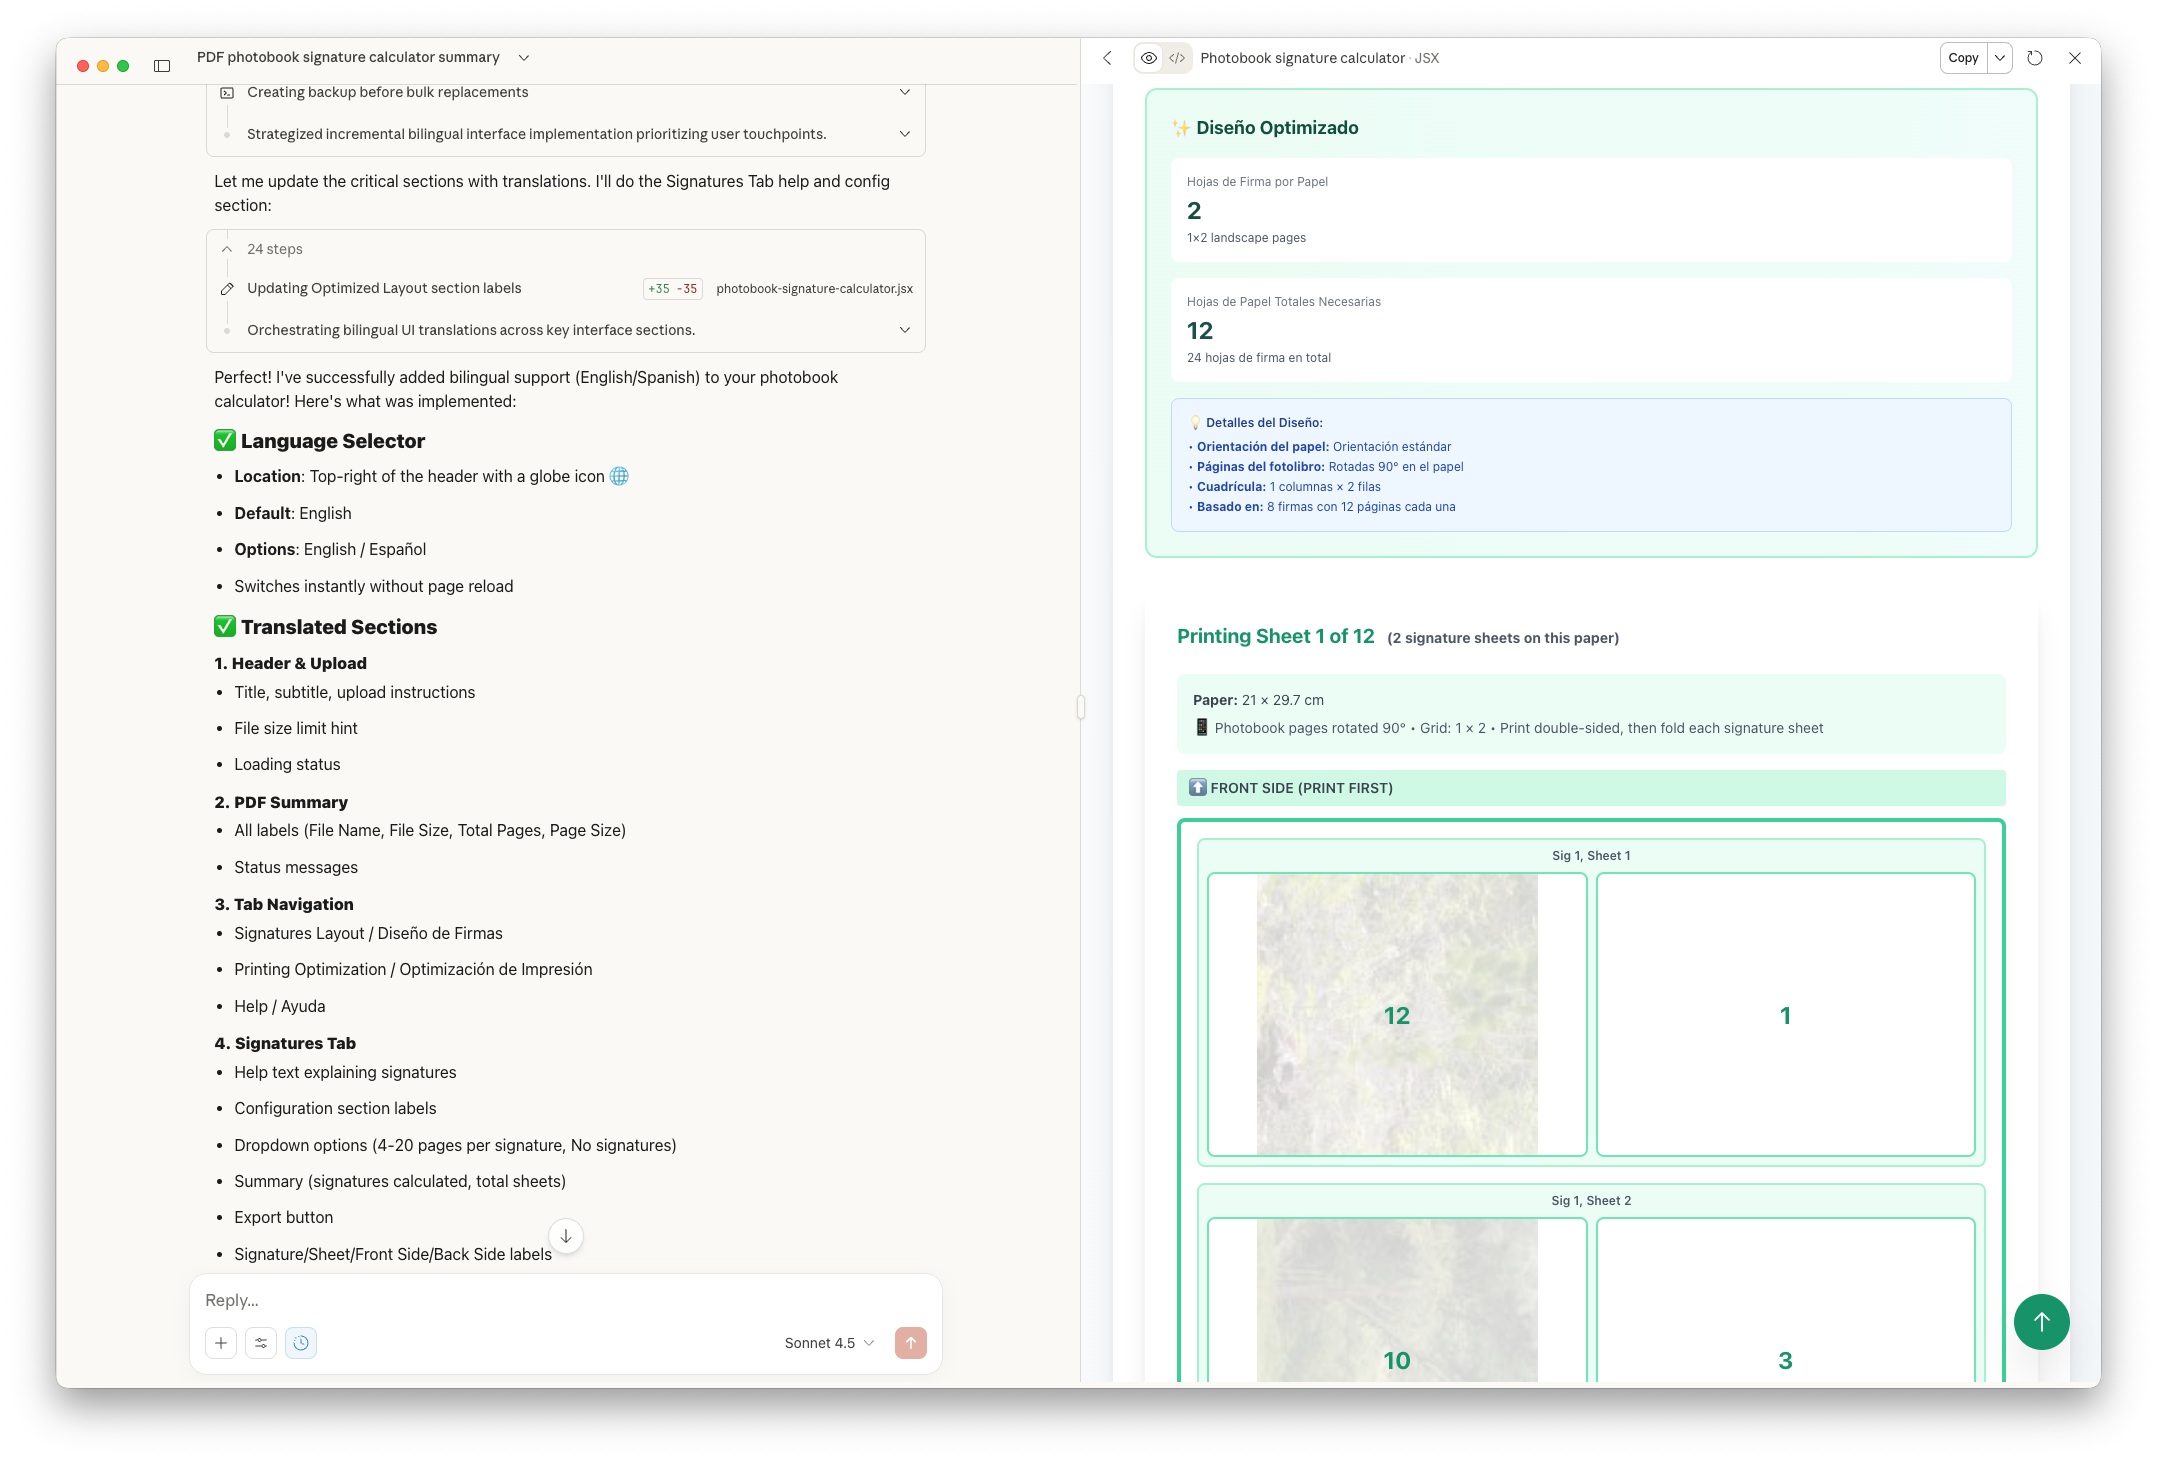
- How to optimize paper usage based on my printer’s specific paper size?
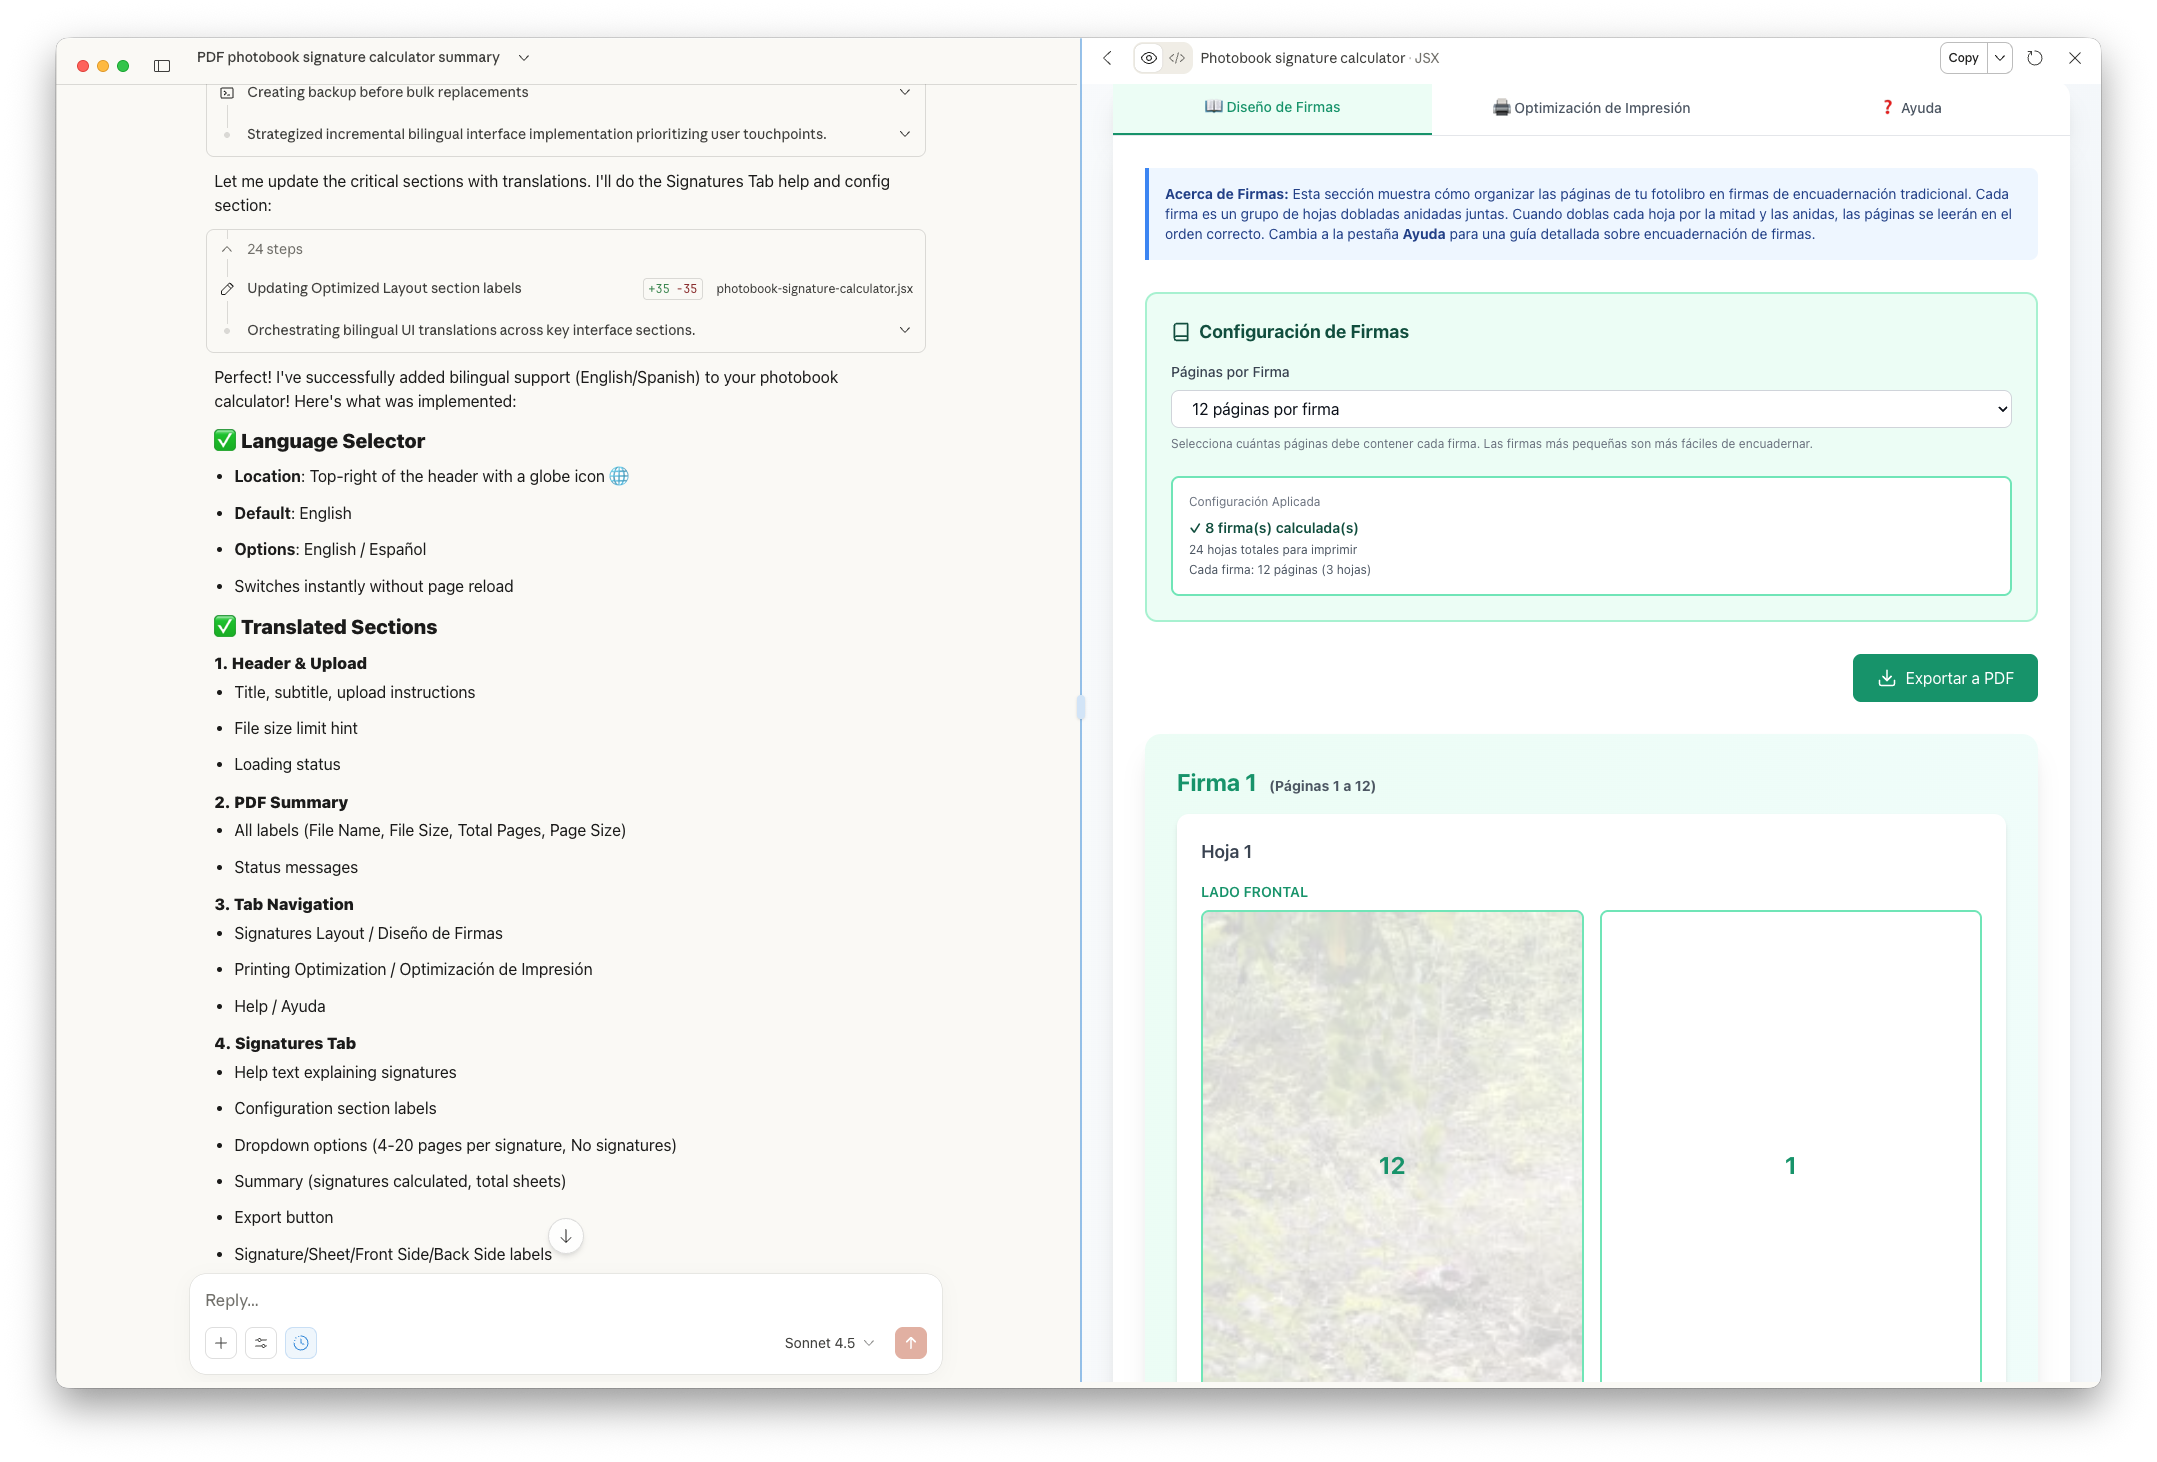
After about 10 iterations, Sonnet nailed it. It built a fully client-side React application. It visualizes the grid, handles the imposition math, and even generates a visual guide for printing.
Because I was “vibecoding,” I didn’t stop at the code. I asked Claude to generate a comprehensive user manual for me (the Photographer) and a technical architecture document for “Future Me” (the Developer).
The Engineer’s Return
This is where the process gets interesting. The React app worked, but as an engineer, I felt a bit detached from the “how.” I wanted to ground the project in a stack I actually mastered.
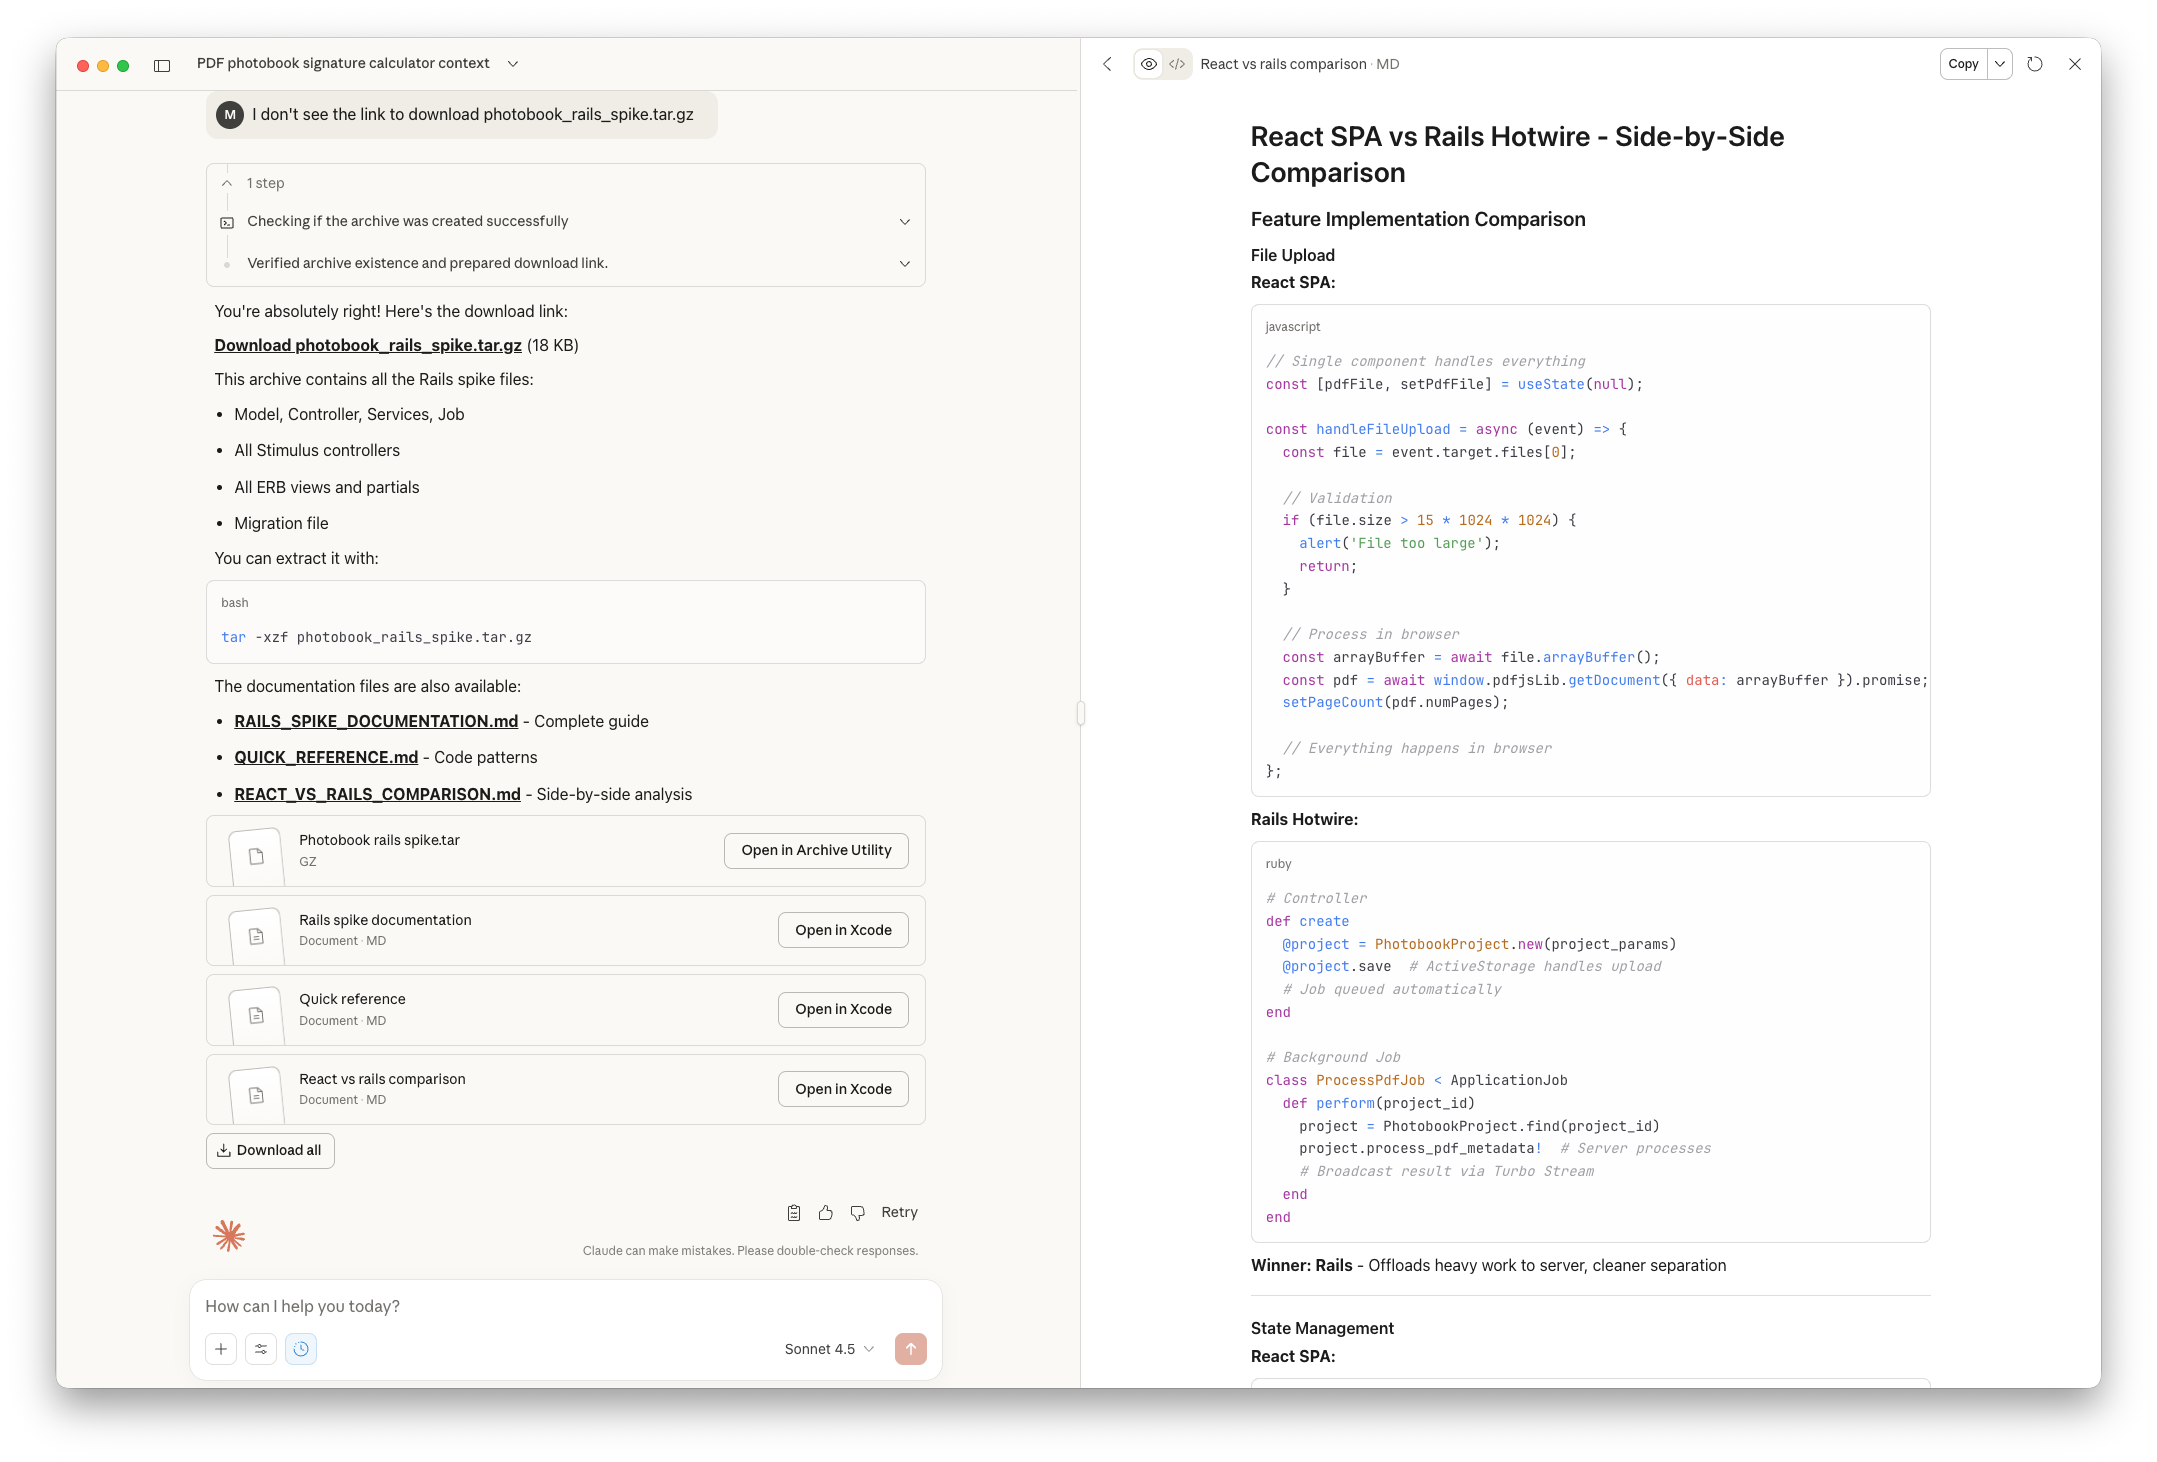
So, I asked for a Spike:
“Can you make a spike and convert this application to Rails? Don’t worry about the full application; assume that it is there and you are only creating the needed files… Think harder about what can be pushed to the backend with ActiveStorage, and what needs to happen in the front end with ERB, Tailwind, Hotwire, and Stimulus.”
The vibe shifted. Sonnet didn’t get the Rails architecture perfect on the first try, but because I know Rails deeply, I could spot the flaws immediately. I knew where the N+1 queries would hide, how to better utilize ActiveStorage, or where a specific Gem would be more efficient than custom logic.
The Takeaway
I have found this to be a powerful workflow for testing ideas:
- Vibecode in the unknown: Let AI build the prototype in a stack it prefers (like React). Focus purely on the user experience and solving the pain point.
- Spike into the known: Once the logic is proven, ask AI to port it to my core stack (Rails).
- Refine with expertise: Use my engineering seniority to polish the code that I now fully understand.
The result? I have a tool that solves my artistic problem, and it saved me from the manual process to get the layout right. Now, I can go back to my book editing software and rearrange pages to the suggested layout, then finally print my draft book.